

by Everett 5/9/2020
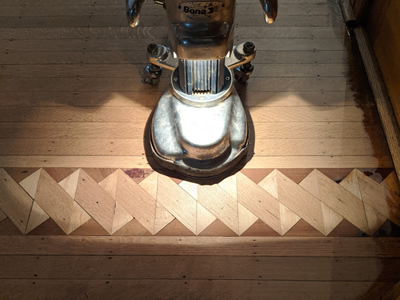
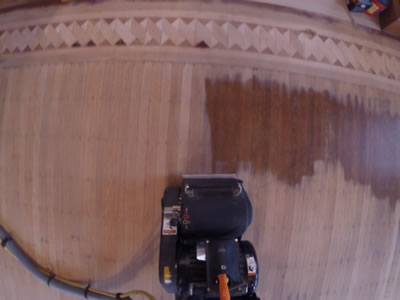
Unlike a typical ¾” thick floor, we can’t just start grinding away on a floor like this. When you have different species of wood with varying densities such as oak or maple vs walnut or mahogany, the softer woods sand much easier and therefore tend to “dish out”. Steel discs on the Multidisc or PowerDrive prevent the sandpaper from flexing down into the softer species, ensuring that the floor will maintain a perfectly flat surface when viewed in the reflection. If we were to sand the border with the drum sander, then finish off with a sanding screen driven by a maroon pad, the mahogany would definitely develop a concave shape. Not only would this look bad, it would also dramatically reduce the life of the border. We’ve actually had to replace entire sections of border before for no other reason than the mahogany or walnut was sanded too thin. Though it will probably take more time, the safe move here is to only sand on the border with steel discs.
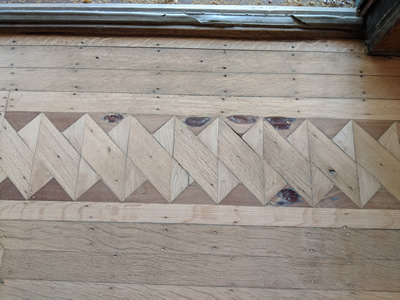
Because of the way these old borders were constructed, not all of the pieces are solidly affixed to the subfloor. Originally these were glued together in a factory, with a thin canvas applied to the bottom. When delivered to the jobsite, they were basically long wide planks that the installer had to cut to size and nail down here and there. The problem with this is that eventually the border gets stepped on a million times and the glue joints break apart, leaving the canvas as the only means of holding many of the pieces down. Most of it is loose, you can push down on it and see the pieces move so I’m nervous about using a waterborne finish on this project. I don’t mind water popping because that will evaporate rapidly, a waterborne finish takes a couple hours to dry and will consist of 3 coats minimum, this has a tendency to edge curl on floors with gaps. I’ll be a lot more comfortable using a conversion varnish or perhaps Rubio Monocoat hardwax oil on something like this.
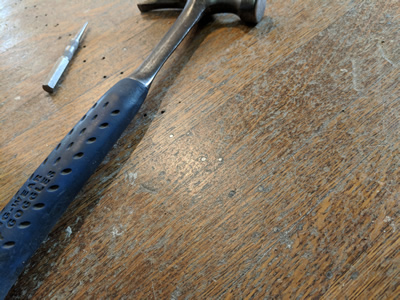
The challenges don’t end with the border. 5/16” face nailed floors offer unique challenges all on their own. Before any machine even gets powered up, the floor needs to be gone over to check for any face nails at or near the surface. If a nail has worked loose and is actually protruding above the surface, it can actually damage the sanding equipment. But even if they’re just flush with the surface, they will quickly dull the sandpaper and we’d just be throwing money away. Punching nails just below the surface, but not too deep, is a time consuming but necessary aspect of refinishing these floors. How often nails will need to be set during the process is generally determined by how many times the floor has been sanded. If there’s still quite a bit of life left in the wood then most of the nails likely will not have been sanded down to. Conversely, if one of these floors has been sanded many times, it’s likely that most of the nails will need to be set throughout the sanding process.
Then there’s the issue of trowel filling to deal with. Generally we don’t like to trowel fill floors because wood moves seasonally due to fluctuations in moisture. If you fill gaps with filler, the wood will eventually either expand, pushing the filler up and out, or the wood will shrink and the filler will separate, leaving a bad looking jagged line in each gap. Trowel filling face nailed floors is a little different though, some say you should compromise on the gaps in order to fill the nail holes. We began offering this service for face nailed floors years ago, but have only trowel filled a handful of times. I don’t know if it’s a regional thing, or if people really appreciate the history aspect of these floors and see trowel filling as sort of trying to “hide” that history or what. They would have been filled when new, so from a purist standpoint they should probably be filled. The way we handle it is to offer it as an add-on and let the homeowner decide. In this case, the client opted to have us fill this one. An issue specific to this job is the color difference between the old wood and the new installation. If we were to use a pre colored filler, it would likely only match the new wood. Instead, we’re going to use a product that mixes with fine wood dust and mix 2 batches to prevent that problem.
There is much more to cover in regards to the sanding process on this floor, but at some point I get rambly and too generalized rather than sticking to aspects of sanding that are particular to this project. So that's all that occurs to me for now, at some point I'll put some thoughts down about the process of choosing a color, and eventually the actual finishing process.