


by Everett 4/11/2020

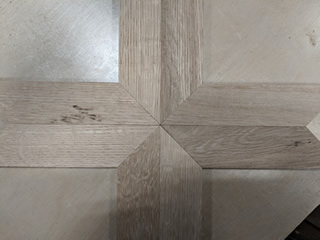
Ok so now all the design elements have been chosen, how on earth are we going to pull it off? Whenever we do a project like this, we like to spend some time making jigs with stops so that every piece we cut for each part of the border is identical. I decided to make a half sled for the table saw, and just to make it more future ready, this time I fabricated a jig made from angle iron that was fully adjustable in both angle and length. Once I had that made, the first step was to adjust the angle and make sure it was cutting a perfect 45* angle (or whatever angle you need), to do this I cut 8 boards with a 45* angle on them. When you place them all together, the angle compounds so if it’s even slightly off, the final one you try to fit in will look way off.
Once I’ve got the angle set I then have to set the length stop and start cutting test pieces. Now more than ever is when Gabe’s spreadsheet comes into play. The dimensions it spits out are in decimal form. We could of course convert them to fractions so that we can use a standard tape measure, but my approach to this whole thing has been to strive for precision knowing that wood is a natural product and that any number of things could happen that would prevent these pieces from fitting together perfectly. To achieve this level of precision I used a digital caliper that reads to one thousandth of an inch. So for instance, the short oak and mahogany pieces are 2.813” to the long point. Rather than try to estimate some kind of 64th of an inch measurement on a tape measure that reads in 1/16” increments, I simply close the digital caliper lightly on the tip of the test piece and gradually adjust the stop to "creep up on it" until I've got the measurement I’m looking for.
Now that the jig is set on both the angle and the length stop, it’s time to mill the wood to width and thickness, again using the digital caliper. This is advantageous to achieve a width of 1.625” for instance, rather than trusting a bent hook on a tape
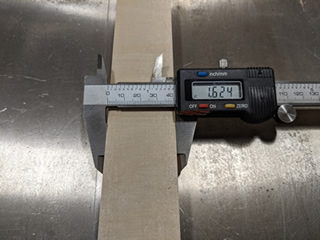
measure or eyeballing it cutting on an inch to achieve a width of 1 5/8”. As for thickness, in cases like this I prefer to resaw on a table saw instead of using a thickness planer. Burn marks from a saw blade sand out much easier than tear-out. Again the spreadsheet is invaluable here because it also tells us how many pieces we need for the desired lineal feet of border. We can derive from that how many lineal feet of each species is needed to make said pieces. A situation I don’t want to run into is running out of one of the pieces and having to set up the jig again, hoping to set it up the exact same way.
With the wood milled and ready to go, it was time to cut out all the pieces. We needed 135 maple squares, 135 short oak pieces, 135 short mahogany pieces, 68 long oak pieces, 68 long mahogany pieces, and a whopping 270 maple triangles for 45 total lineal feet of border. The final step here was to put these pieces together in what can best be described as sections of mosaic tile to make it easier to install on site. I made a small frame to the exact dimension of the border width, placed the pieces in this frame and used wide painters tape to keep the sections together. Here’s a video I put together showing the whole process: