

by Everett 4/5/2020
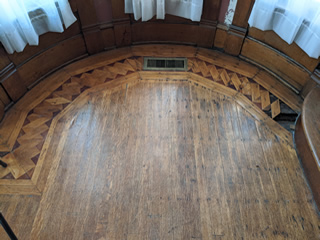
We were contacted around fall of 2019 to look at a house built in 1902 in the town of Franklin, Indiana. The original floor was a 5/16” face nailed quartersawn white oak floor like so many others here in central Indiana, but unlike most it had a border in the entry hall. The client wanted the floors sanded and some repairs done here and there due to previous roof leaks, but right away Gabe noticed that the floors in the parlor, library, and back room were actually 3/8” tongue and groove floors that had been added later- someone had face nailed them in an attempt to make them look like the original floors. We never even try to sand floors like this. Some contractors do, and produce nice floors, but we don’t feel comfortable sanding the already thin wear layer down even thinner.
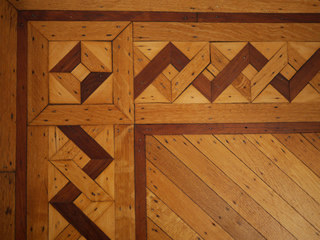
"Two twisted ribbons" design
Unfortunately the flooring in these rooms had to be removed and replaced with a new version of the real thing, though maybe the use of the word “unfortunately” here is subjective- that opened the door for adding another border in the parlor, and that’s exactly what this client opted to do. The client writes the blog vivaciousvictorian.com, an excellent blog documenting the restoration of this beautiful house. She had found this website called floorborders.com which is a great repository of historic border designs, and had one picked out for the parlor- one the website calls “two twisted ribbons”. She also liked the idea of using the same materials used in the original border in the entry hall- namely maple, mahogany and oak.
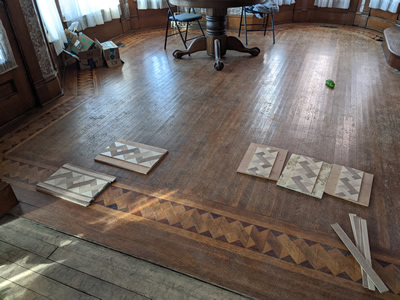
We had a goal in mind, now we had to figure out how we would achieve it. The first thing we had to do is determine the dimensions of the various elements of the design she picked out, which would in turn determine the overall width of the border. Gabe went right to work writing a spreadsheet that would do all of the math for us. Once that was done we decided to build a few mock-ups to make this decision easier to visualize. Rather than waste expensive wood for these, we used ¼” oak plywood. The piece we used already had some kind of wood on the back that sort of looked like mahogany, so that was convenient as we could just use one side or the other for those two species. And for the maple we used a piece of prefinished ¼” maple plywood.
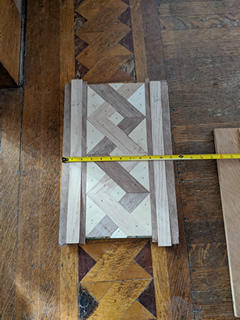
The original design she picked from the website had a strip of the 2” quartered white oak on each side of the border with an additional 1” or 1 ¼” strip of mahogany outside of that (it’s hard to tell how wide things are from a picture on the internet). For the mock-ups we also included various widths of strips that she could swap around to determine how she wanted that part to look. Her final decision was far better than the original she chose from the website- ½” mahogany first, followed by a 1 3/16” strip of quartered white oak, and finally a strip of ¾” mahogany on the outside. The distance out from the wall was to match the entry hall border- 4” (2 rows of the 2” oak strip flooring).